The post mainly consists of post installation notes, rebuild stuff I'll come back to:
The distributor pages in the electrics section of the DAF blue manual are a bit vague. The same pages in the Volvo green manual are better, but still don't answer the basic question:
Which way is the drive dog fitted to the distributor shaft? I ended up looking at a Land Rover manual at one point and even they tell you which way it goes!
The clue though, is in the engine section...
(I've just been outside to the BB and looked at her dizzy, I fitted it the right way round Pete

, it was on wrong)
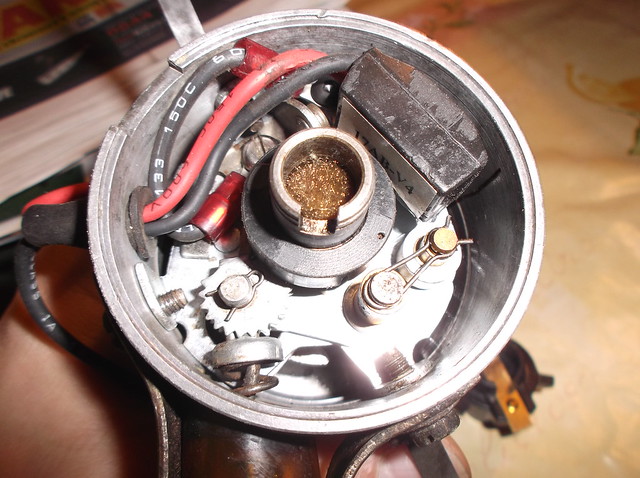
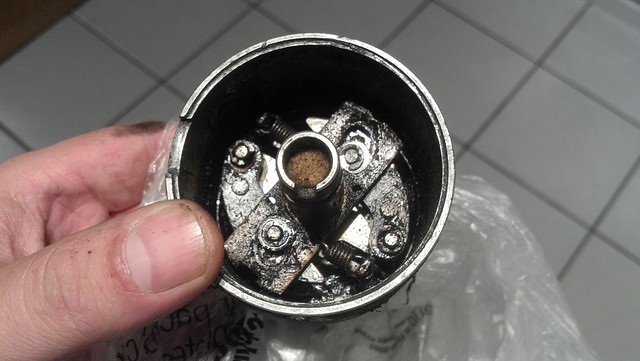
To recap, here's how it arrived:
 2014-10-03_22-56-32_854
 by
macplaxton, on Flickr
 2014-10-03_22-56-43_461
 by
macplaxton, on Flickr
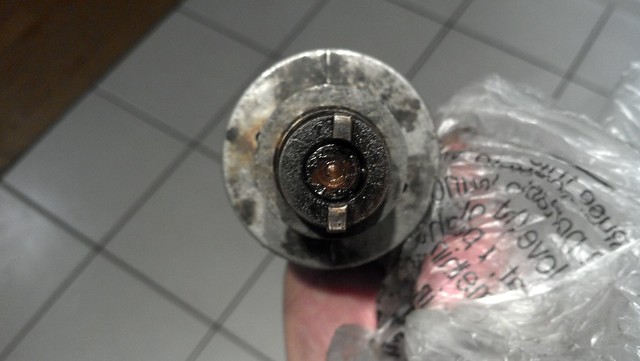
The rotor arm notch is pointing at 6 o'clock, flip it over and the drive is offset to the right.
Now looking at the (V66) manual:
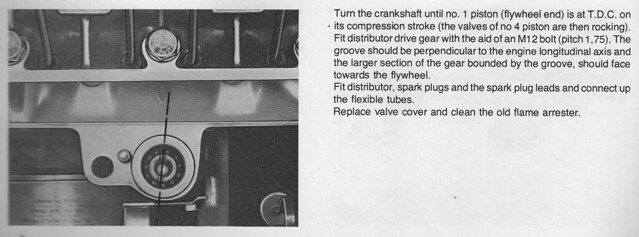 Volvo B130 Distributor Drive Orientation
 by
macplaxton, on Flickr
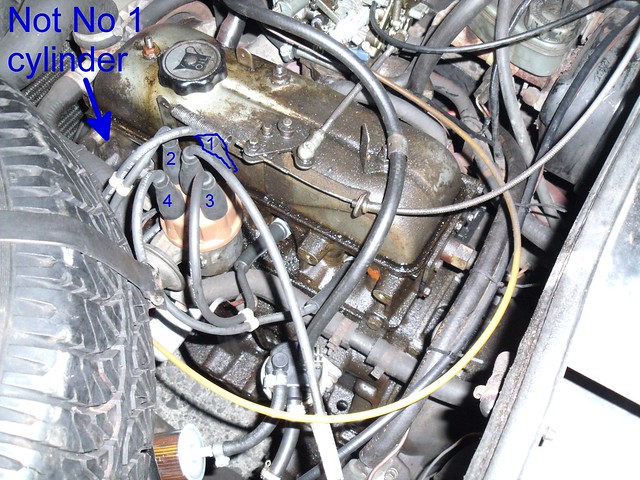
You can see that when No.1 pot is at TDC firing (that's the cylinder at the flywheel end, not the radiator. It's a French thing

) the larger chunk of metal is
nearest the flywheel. If it isn't, now is a good time to find a M12 x 1.75 bolt that's long enough to reach that gear and fish it out and put it the right way round (picture please Pete looking down the hole
)
So if you have the dizzy in front of you and you lie it's side with the notch at the top of the shaft pointing upwards, then the drive dog on the dizzy should be fitted like so:
 Land Rover Distributor Drive Orientation
 by
macplaxton, on Flickr
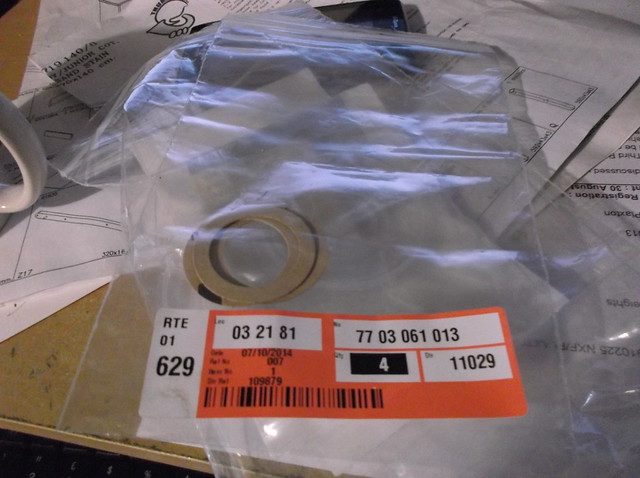
Now before fitting the distributor, clean the mounting face at the top of the block without getting crap down the hole. Also, there is actually a paper gasket between the distributor and the engine block:
They are still available from Renault if you can't be bothered to get some scissors and gasket paper out...
 DSCF7884
 by
macplaxton, on Flickr
Once fitted the distributor should be pointing this sort of way, with the vacuum advance pointing more or less to the inner wing:
 DSCF6638b.JPG
 by
macplaxton, on Flickr
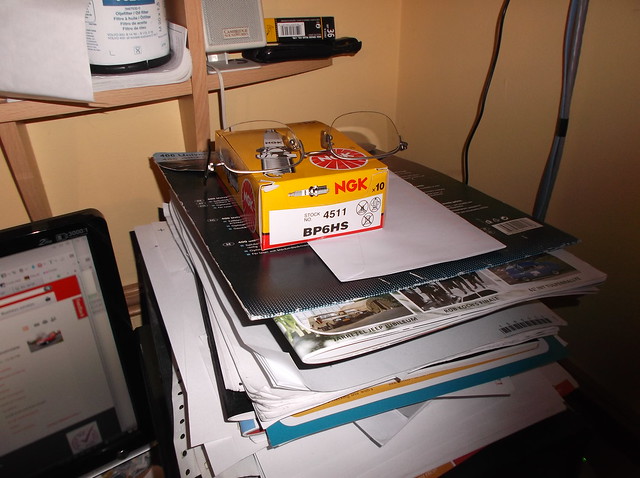
Find four spark plugs. NGK BP6HS will do. Last time I was looking for these I ended up have to get two from Ted Johnson's the lawnmower/garden/outdoors/hardware/general store shop and two from a motor factors in Naas. In both cases it was the last two in the box. Y'see NGK plugs come in boxes of ten... Now I prestock 'em.
 DSCF7837
 by
macplaxton, on Flickr
Gap is down in the book as 0.6mm - 0.7mm. Fine for standard ignition. Pete, in your circumstances you might want to give them a shot at 0.8mm gap (0.032" old money). Take extreme care when fitting plugs to a French cheese head, it's really easy to cross thread them. Especially pot 4

or 3 where the alternator bracket is.
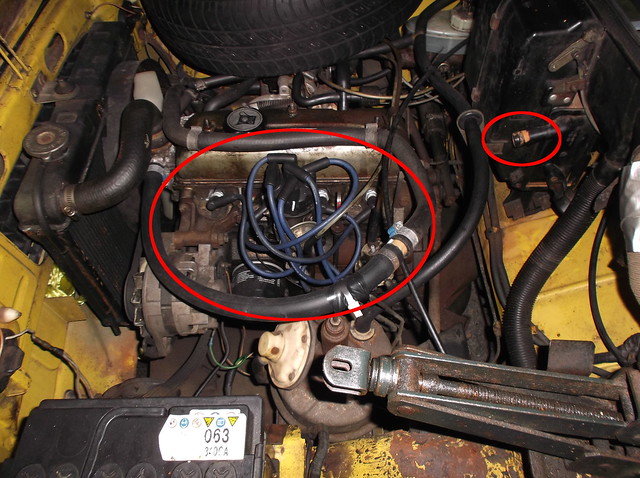
Next up HT leads. I mention these because either the catalogues don't list them (Intermotor) in the application guide any more or they list ridiculously long leads (when annoying they have a shorter more suitable set available) like so:
 DSCF7728
 by
macplaxton, on Flickr
A complete rat's nest that!
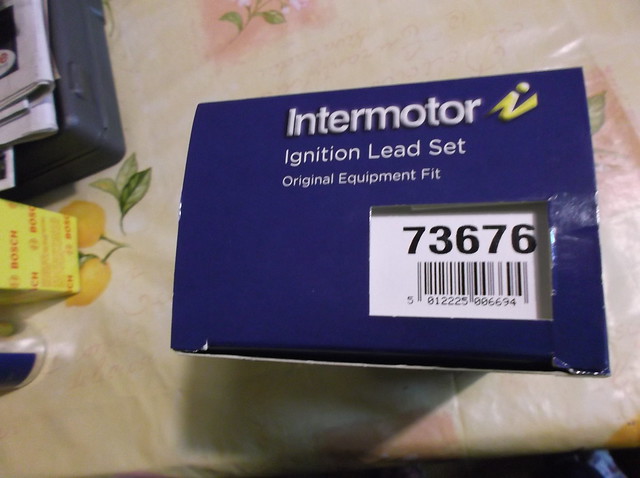
So here's a shot of the Intermotor 73676 set (Renault 4).
 DSCF7876
 by
macplaxton, on Flickr
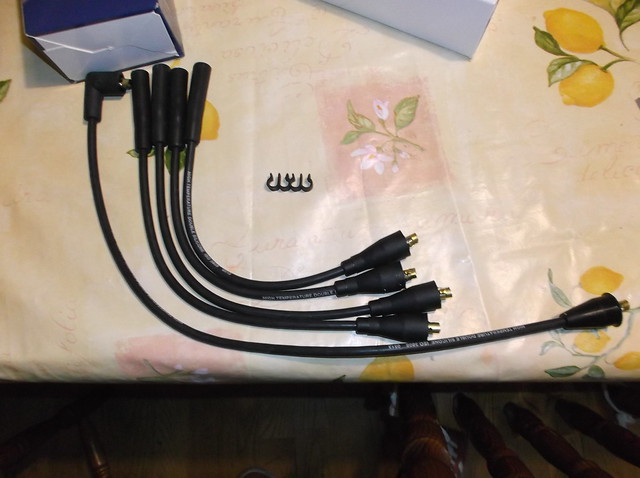 DSCF7881
 by
macplaxton, on Flickr
I was really looking for a Bougicord set as they are shorter, but these aren't too ridiculous. End to end, two of the plug leads are 350mm, two are 400mm and the dizzy to coil lead is more than long enough at about 570mm. Than you Intermotor - NOT - for listing there lengths in your crappy catalogue.
Static timing on a 1108cc is 0 degs - TDC, for a 1289 (B130) it is 6 degs BTDC (unless it is a B130S, where we're back to 0 degs - TDC) These are just starting points, you'll want to fiddle with it bit to get the best running on local juice.
Find your flywheel markers and get some white paint on them. Dig the strobe out and time away. Remember to disconnect the vacuum advance btw and if you can see what the mechanical advance is doing in-situ. I think full advance is 30 degs (engine) at 3000 rpm. It should be stamped on the body of the dizzy.
That's all for now as work beckons, more later.


 ) the larger chunk of metal is nearest the flywheel. If it isn't, now is a good time to find a M12 x 1.75 bolt that's long enough to reach that gear and fish it out and put it the right way round (picture please Pete looking down the hole
  or 3 where the alternator bracket is.